 CoreAxis ePOS
Settings
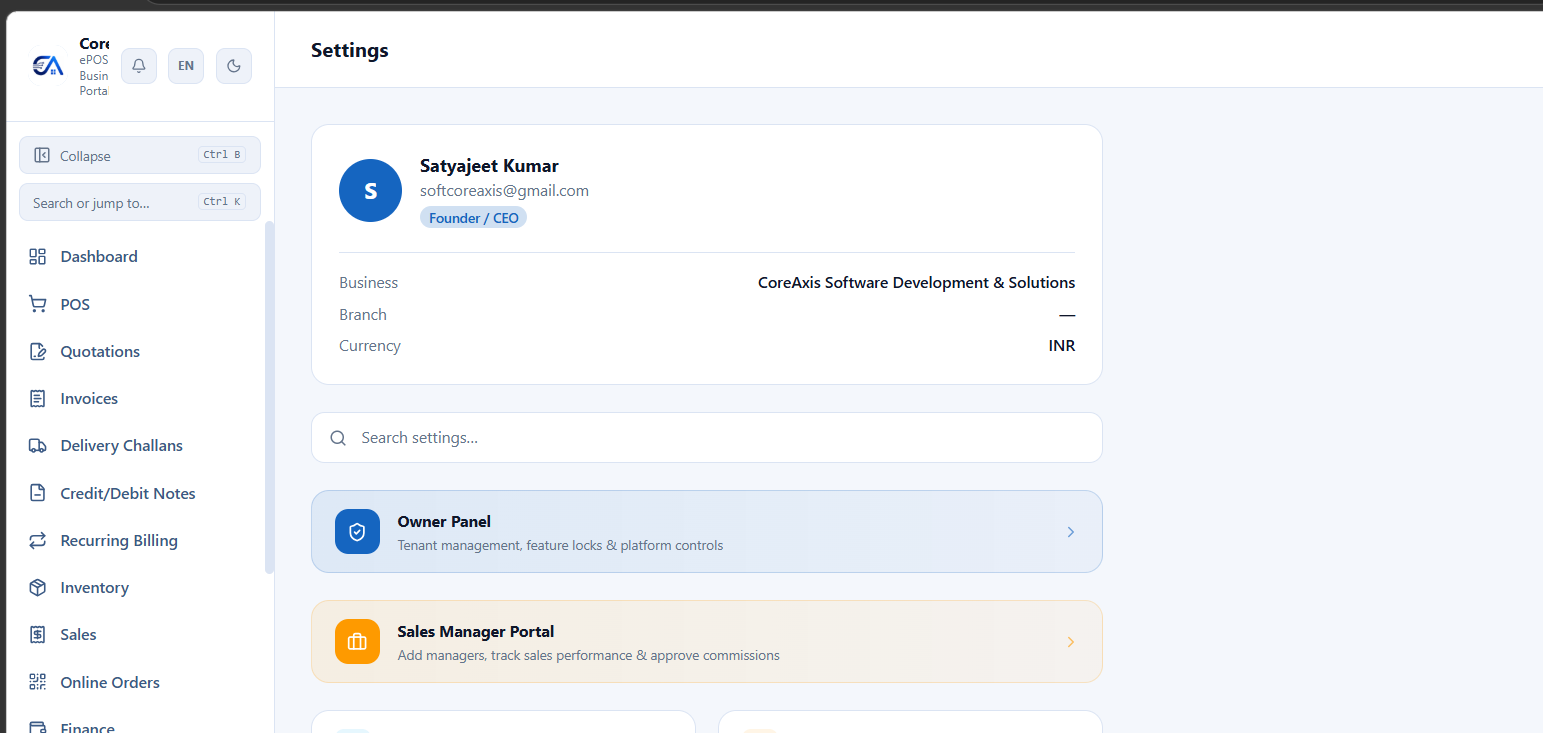
Business Profile
Go to Settings → Business Profile to configure:
- Business name, legal name, address, state, pincode
- Phone, email, website
- Business logo (displayed on invoices and the app header)
- GSTIN, PAN, registration details
- UPI ID and bank account details (for invoices and scan-to-pay QR)
Invoice Customization
Go to Settings → Invoice Configuration.
Template Selection
Choose from 12 templates: Modern, Classic, Minimal, Royal, Simple, Formal GST, MARG Style, Pharmacy, Restaurant, Electronics, Jewelry, Wholesale.
Column Toggles
- Serial Number, HSN Code, Rate, Discount, GST Analysis — show or hide each column.
Content Toggles
- Logo, UPI QR Code, Amount in Words, Previous/Current Balance
- Declaration, Authorized Signatory, Customer Signature, Receiver Signature, Verified By
- Bank/Payment Details, Payment Due Date
- Vehicle No, Transport Mode, Transporter Name, Place of Supply, E-Way Bill No
- Custom header text, footer text, and terms & conditions
Invoice Numbering
Auto-incrementing with a configurable prefix (e.g., "INV-", "SA-", your brand abbreviation).
Tax Configuration
- Manage GST tax rates: 0%, 5%, 12%, 18%, 28% (and custom rates).
- HSN/SAC code master for product classification.
- Cess rates for applicable products.
- Tax-inclusive vs tax-exclusive pricing default.
- Reverse Charge Mechanism (RCM) settings.
- E-Invoice GSP credentials (for NIC portal integration).
Roles & Permissions
Control who can do what in your business.
Roles
Create custom roles or use defaults: Owner, Manager, Cashier, Accountant, Salesperson.
Permission Matrix
For each module (POS, Inventory, Finance, CRM, HR, etc.), toggle:
- View — can see the data
- Create — can add new records
- Edit — can modify existing records
- Delete — can remove records
Module Access per Role
Control which modules each role can access.
Staff Access (Sidebar Visibility)
Go to Settings → Staff Access to control which sidebar items are visible to each role. Owner can toggle any section on/off per role.
Role Scopes
- System: Platform-wide roles (super admin).
- Tenant: Business-wide roles (owner, manager, accountant).
- Branch: Branch-specific roles (branch manager, cashier at a specific branch).
Security & MFA
- MFA / Two-Factor Authentication: Enable TOTP-based 2FA using Google Authenticator or Authy. Scan a QR code to set up. Required at every login.
- Password Change: Change your password anytime from Settings → Security.
- Device Management: View all devices logged into your account. Revoke access to any device.
- Auto Logout: Configure idle timeout — automatically logs out after a period of inactivity.
- Audit Logs: View a log of all important actions taken in the system — who did what and when.
- App Lock (Mobile): Enable PIN lock on the mobile app. Every app open requires a PIN.
Printer Setup
Thermal Printer (Mobile)
- Go to Settings → Thermal Printer on the mobile app.
- Turn on Bluetooth on your phone and the printer.
- Click Scan for Printers.
- Select your printer from the list and click Connect.
- Print a test receipt to verify.
- The app remembers this printer and auto-connects on future launches.
Desktop/Web Printing
- USB and network thermal printers are supported via the Desktop app's native print bridge.
- A4/Letter printing uses the browser's standard print dialog.
Notifications
- Invoice Sharing: Share invoices via WhatsApp or email — templates are pre-built.
- Dues Reminders: Send payment reminders via WhatsApp/SMS to customers with outstanding balances.
- Inventory Alerts: Low-stock and expiry alerts sent via WhatsApp/SMS.
- Milk Bill Sharing: (Dairy) Share milk bills to farmers via WhatsApp.
- Web Push Notifications: Real-time browser notifications for online orders, low stock, etc.
Data Import & Export
Import
- CSV/Excel Import: Import products, customers, suppliers from CSV/Excel. Download a template, fill in data, upload, preview, execute.
- Tally Import: Import your Tally data — accounts, products, customers, suppliers, and transactions.
- BUSY Import: Import from BUSY Accounting software.
- Marg Import: Import from Marg ERP.
Export
- Full Data Export: Download all your data as a ZIP file (Settings → Export All Data).
- Tally Export: Export as Tally-compatible XML for import into Tally Prime / ERP 9.
- Marg Export: Export as Marg ERP-compatible Excel.
- Report Export: Every report screen has a one-click Excel/CSV export button.
Backup & Restore
- Cloud Backup: Your data is automatically backed up to the cloud.
- Manual Restore: Owner can restore from a previous backup (owner-only permission).
- Factory Reset: Complete data reset with two modes — Full Reset (deletes everything) or Keep Masters (keeps products, customers, suppliers but deletes transactions). Requires owner approval.
Subscription
- View your current plan, usage, and billing cycle from Settings → Subscription.
- Upgrade, downgrade, or cancel your plan.
- Payments via Razorpay — UPI, cards, net banking, wallets.
- Enable Autopay for automatic renewals.
API Keys & Webhooks
For developers and integrations.
Public REST API (v1)
- Generate scoped API keys with specific permissions:
read:inventory,read:crm,write:crm,read:pos. - Endpoints for: Products, Customers, Sales.
- Use for custom integrations, e-commerce sync, or data pipelines.
Webhooks
- Razorpay subscription webhooks for payment processing.
- WhatsApp inbound webhooks for chatbot interactions.
Feature Configuration
Enable or disable specific features across your account from Settings → Feature Config.
- Toggle modules on/off: POS, Inventory, Finance, CRM, HR, GST, Reports, Quotations, Documents, Assets, etc.
- Enable industry-specific features: batch tracking, shade management (tiles), IMEI tracking (mobiles), etc.
- Disabled modules are hidden from the sidebar and are not accessible by any user.
- Changes take effect immediately — no restart needed.
Industry Settings
Configure industry-specific behaviour from Settings → Industry Settings.
- Industry Type: Your primary industry (selected during registration). Changing this reconfigures available features.
- Industry-Specific Options: Each industry has its own settings — e.g., Pharmacy has drug schedule tracking; Restaurant has KOT/table management; Tiles has shade/grade management.
- Enable secondary industry modules if your business spans multiple verticals (e.g., a general store that also does mobile repairs).
Branding & White Label
Customise the look and feel of your CoreAxis instance.
- Logo & Favicon: Upload your business logo. It appears on the sidebar, invoices, receipts, and the customer portal.
- Invoice Header/Footer: Custom text, terms, and images on invoices.
- White Label: Available on Enterprise plans — custom domain, custom branding, remove CoreAxis branding from all customer-facing pages.
- Theme Colors: Adjust primary accent color for the web app and customer portal.
Sidebar Customization
Reorder and hide sidebar menu items to match your workflow.
- Go to Settings → Sidebar Order.
- Drag and drop menu items to reorder them — put your most-used modules at the top.
- Toggle visibility of individual items — hide modules your team doesn't use.
- Changes apply to all users with the same role, or create role-specific sidebar layouts.