 CoreAxis ePOS
POS & Billing
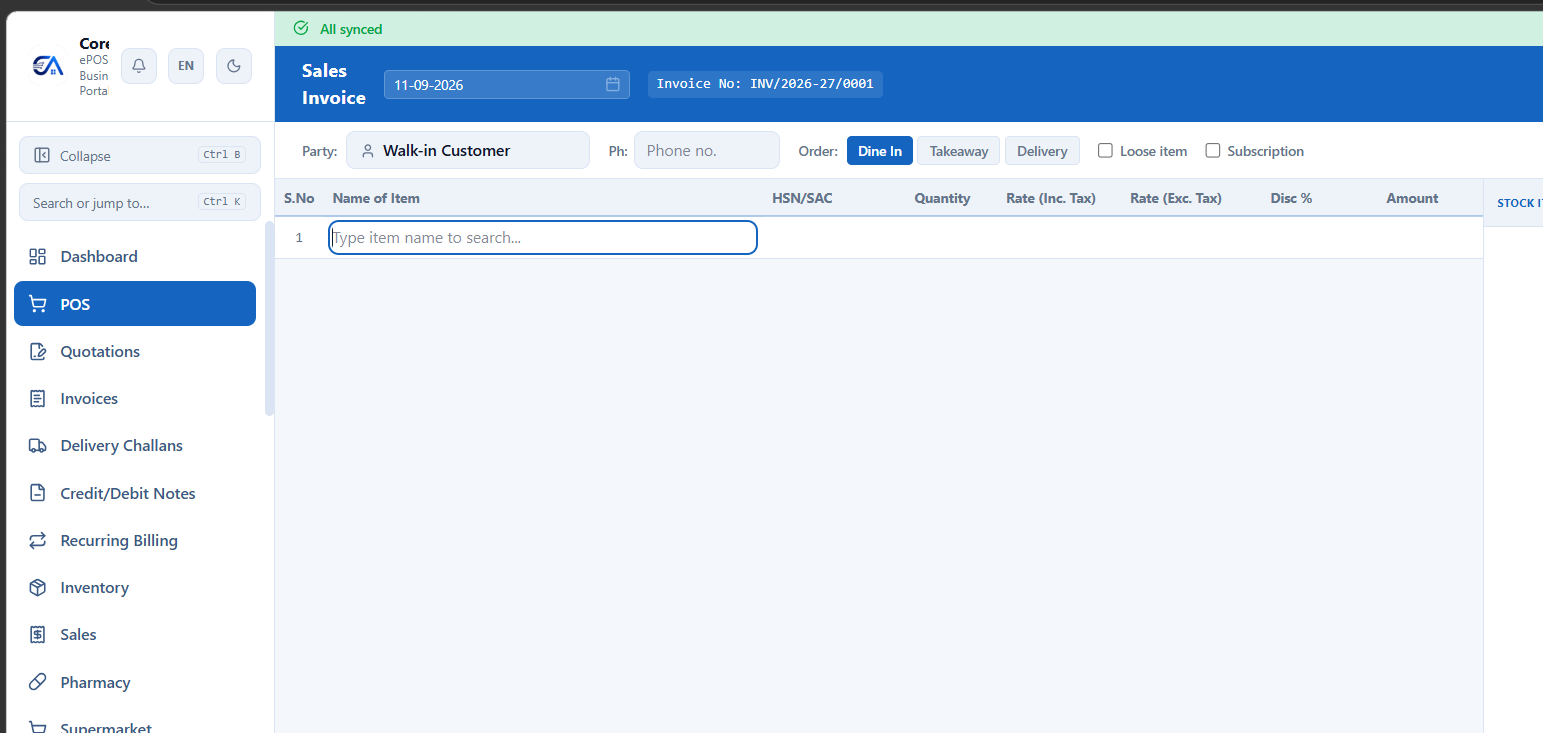
The Point of Sale is the heart of CoreAxis ePOS — a fast, full-featured billing screen that works on web, desktop, mobile, and offline.
Creating a Sale
From the POS screen:
- Product search: Type the name, SKU, or barcode in the search bar. Results appear instantly.
- Barcode scan: Use a USB/Bluetooth barcode scanner or the built-in camera scanner to add products.
- Quick Keys: Configure product shortcut tiles for your most-sold items. One tap to add to cart.
- Cart editing: Adjust quantity, apply per-item discount (% or flat), change tax rate, add notes.
- Customer selection: Search and assign a customer. For walk-in sales, leave blank.
- Checkout: Select payment method, enter amount, complete the sale.
Payment Methods
| Method | Description |
|---|---|
| Cash | Enter the amount received. Change is calculated automatically. |
| UPI | Customer scans your UPI QR code. Mark as paid. |
| Card | Swipe/tap on external card terminal. Mark as paid. |
| Credit | Sale goes on customer's account (khata). Tracked in customer ledger. |
| Split Payment | Combine any methods — e.g., ₹500 cash + ₹200 UPI. Total must match exactly. |
Discounts & Tax
Discounts
- Per-item discount: Apply a percentage or fixed discount on each line item.
- Product-level default: Set a default discount on the product master — it auto-applies at POS.
- Coupon codes: Apply a promotional coupon at checkout. See Coupons.
Tax (GST)
- Each product carries its own GST rate (0%, 5%, 12%, 18%, 28%) and optional Cess.
- Pricing can be tax-inclusive or tax-exclusive, configured per product.
- For B2B sales with GSTIN, tax splits into CGST + SGST (intra-state) or IGST (inter-state) automatically based on customer's state vs your state.
- The GST Analysis section on the invoice shows a rate-wise tax breakdown.
Invoices & Templates
CoreAxis offers 12 invoice templates:
Modern
Clean, contemporary design with colour accents.
Classic
Traditional invoice layout with borders and grid.
Minimal
Simple, whitespace-focused design.
Royal
Premium look with decorative elements.
Simple
Basic no-frills invoice.
Formal GST
Tally-style GST invoice with all statutory fields.
MARG Style
MARG ERP-compatible invoice format.
Pharmacy
Drug-specific layout with batch, expiry, MFG columns.
Restaurant
Compact bill format for food service.
Electronics
Serial number and warranty-focused layout.
Jewelry
Weight, making charges, and hallmark fields.
Wholesale
Bulk-order layout with landing cost columns.
Invoice Customization
Go to Settings → Invoice Configuration to toggle:
- Columns: Serial No, HSN, Rate, Discount, GST Analysis
- Content: Logo, UPI QR Code, Amount in Words, Previous/Current Balance, Declaration, Authorized Signatory, Customer Signature, Receiver Signature, Verified By, Bank/Payment Details
- Transport: Vehicle No, Transport Mode, Transporter Name, Place of Supply, E-Way Bill No
- Custom header and footer text, payment terms, and notes
Returns & Cancellations
- Full return: Open the sale → click Return → select all items → process refund.
- Partial return: Select only the items being returned and their quantities.
- Cancel / Void: Cancel a sale entirely. Stock is restored. The invoice is marked void.
- Return generates a Credit Note automatically. See Credit & Debit Notes.
Parked / Hold Bills
Need to pause a sale and serve another customer? Park it.
- While billing, click Park Sale (or press the shortcut key).
- The current cart is saved with all items, quantities, discounts, and customer info.
- Serve the next customer normally.
- To resume: click the Parked Sales icon → select the parked bill → it loads back into the POS.
Shift Management
Track cash accountability per cashier per shift.
- Open Shift: Enter the opening cash amount at the start of your shift.
- All sales during the shift are tracked — cash, UPI, card, and credit.
- Close Shift: Enter the physical cash count. The system calculates the expected amount and shows the difference.
- Add shift notes if needed (e.g., "₹200 petty cash withdrawn").
Quick Keys
Configure product shortcut tiles on the POS screen for your fastest-selling items.
- Go to POS → Quick Keys (gear icon).
- Add products to the grid. Drag to reorder.
- One tap/click adds the product to the current cart.
Barcode Scanning
- USB/Bluetooth scanner: Plug in a USB barcode scanner or pair via Bluetooth. Scanning auto-searches and adds the product.
- Camera scanner: On web and mobile, use the built-in camera barcode scanner — click the camera icon in the POS search bar.
- Label printing: Generate and print barcode labels from Inventory → Print Labels.
Thermal Printing
Print receipts on ESC/POS thermal printers.
- Mobile: Connect via Bluetooth from Settings → Thermal Printer. Pair your printer, then receipts print automatically after each sale.
- Desktop/Web: Connect USB or network thermal printers via the desktop app's native bridge.
- Thermal receipts include: business header, items, tax breakdown, payment details, QR code, and footer text.
KOT & Kitchen Orders
For restaurants, cafes, and food businesses using the Restaurant or Cafe module.
- Set up Kitchen Stations (e.g., Main Kitchen, Bar, Desserts) from Settings.
- When creating a sale, items are sent as KOT (Kitchen Order Tickets) to the assigned station.
- Kitchen staff update item status: Preparing → Ready → Served.
- View all active KOTs from KOT Management in the sidebar.
Tables & Tokens
- Dine-in Tables: Set up tables from Settings. Assign a sale to a table. Tables show status (available/occupied).
- Token Queue: Generate numbered tokens for customers. Call the next token. Mark as complete or cancel.
Online Orders (QR Catalog)
Let customers browse and order from their phone.
- Go to Settings → Online Orders and enable the public catalog.
- A unique QR code is generated for your business.
- Customers scan the QR, browse your product catalog, add items to cart, and place an order — no login required.
- Orders appear in your Online Orders screen with a notification.
- Accept, reject, or fulfil orders. Optionally enable Razorpay online payment.
Recurring Billing
Automate repeated invoices for subscriptions, AMCs, or monthly services.
- Go to Recurring Billing → Create Plan.
- Select the customer, products, frequency (weekly/monthly/quarterly/yearly), and start date.
- Invoices are generated automatically on schedule.
- Track plan status, mark invoices as paid, and export reports.
Coupons
Create promotional discount coupons.
- Go to POS → Coupons → Create.
- Set a coupon code, discount type (% or flat), value, minimum order amount, and validity dates.
- Toggle active/inactive. Share the code with customers.
- At POS checkout, the customer or cashier enters the coupon code to apply the discount.